


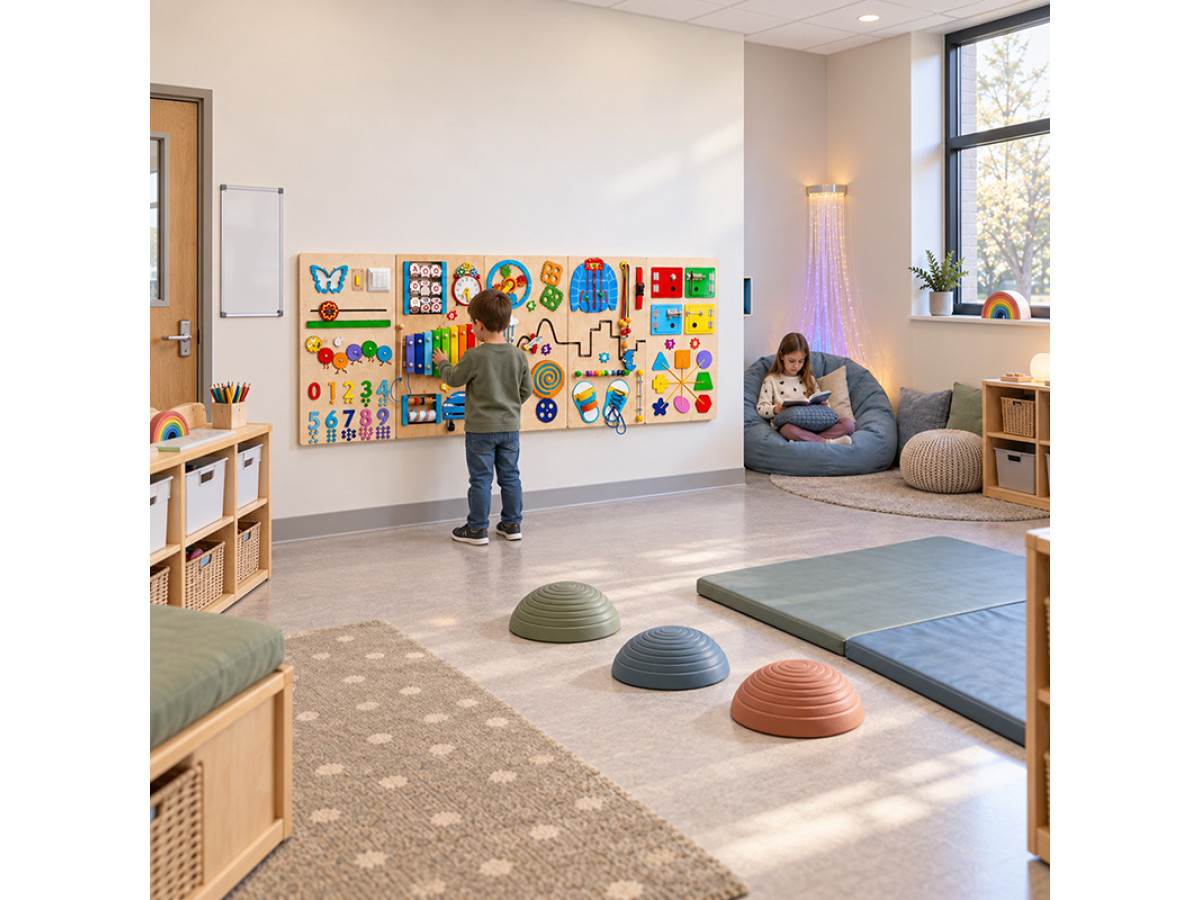
Setting up a sensory room in a school is a facilities project as much as a therapeutic one. This guide covers how to create a sensory room in schools, step by step: choosing the room, working out a budget, deciding what goes on the walls versus the floor, and making sure the space works for a rotating group of students rather than one child at a time. It's written for administrators, special education teams, occupational therapists, and facility planners starting from a blank room.
If you're looking for a general list of what belongs in any sensory room, see what should be in a sensory room. This guide focuses specifically on the planning decisions that come before you buy anything: space, zoning, budget, accessibility, and upkeep in a shared institutional setting.
How to Create a Sensory Room in Schools: What It Is
A school sensory room is a dedicated space, usually a single classroom or a converted storage or resource room, set up to give students structured access to sensory input and a lower-stimulation environment when they need one. It's distinct from a single sensory corner inside a busy classroom (which offers a quick break but not a full room-level environment) and from a single piece of equipment, like a wall panel installed in a hallway. A dedicated room means a door that closes, a consistent layout, and equipment chosen for shared, repeated use under staff supervision.
Schools use these rooms for scheduled sensory breaks, as a de-escalation space, as one option within a student's broader support plan, and simply as something teachers can offer when a student needs a few minutes to reset before returning to class. Whether and how a sensory room fits into a specific student's support plan is a decision for the school's special education team, based on district policy and the student's individual plan.
Who will use the room
Before choosing a single piece of equipment, define the user group, because it changes almost every other decision. A room serving a self-contained SPED classroom of 8 students looks different from a room shared building-wide as a drop-in resource for any student who needs it. Questions worth answering up front:
- Will the room serve one classroom, one grade band, or the whole building?
- Will students use it independently, with one staff member, or only in small supervised groups?
- Is this primarily for students with diagnosed sensory processing differences or autism, or a general-use calm-down space open to any student?
- What age range? Equipment height, durability requirements, and layout change significantly between elementary and high school.
For students who benefit specifically from sensory input as part of autism support, it's worth reviewing what should be in a sensory room for autism alongside this guide, since some of the zoning and equipment choices below carry extra weight for that group.
Define the purpose before choosing equipment
One common planning mistake is buying equipment before deciding what the room is for. A room built primarily to calm an overwhelmed student down needs low lighting, soft textures, and minimal choice. A room built to give an under-stimulated student active input needs the opposite: movement options, brighter interactive elements, and more to do. Many school sensory rooms end up serving both purposes at different times of day, which is fine, but it needs to be a deliberate design decision, not an accident of whatever equipment was available.
Write the purpose down in a sentence or two before ordering anything. It becomes the test for every equipment decision that follows: does this serve calming, does it serve engagement, or does it do both depending on how it's used?
Choosing the right room
Almost any unused or underused room can work, but a few physical characteristics make the setup easier and the room more useful long-term.
What to look for in a room
- Size: there's no fixed size requirement. What matters is whether the room fits the number of zones and students you're planning for. In smaller rooms, equipment with a smaller footprint may be useful, and wall-mounted options are one way to preserve floor space. A larger room gives more flexibility to run a calming zone, a tactile zone, and a movement zone side by side.
- A door that closes and, ideally, a window or window panel in the door so staff can supervise without the room feeling monitored.
- Wall space free of fixed cabinetry, radiators, or vents where wall-mounted equipment would go.
- Lighting control, meaning a room where overhead fluorescent lighting can be dimmed, turned off, or supplemented, rather than a room lit entirely by uncontrollable overheads.
- Flooring that can be swapped or covered if the existing surface is hard tile and the plan includes floor-based tactile or crash-pad equipment.
- Proximity to the classrooms or grade level that will use it most, so a sensory break doesn't cost a long walk that a dysregulated student can't manage.
Zoning the room
Once the room and purpose are set, break the space into functional zones rather than scattering equipment evenly across the floor and walls. Many school sensory rooms use some combination of the following, scaled to the room's size:
Calming zone
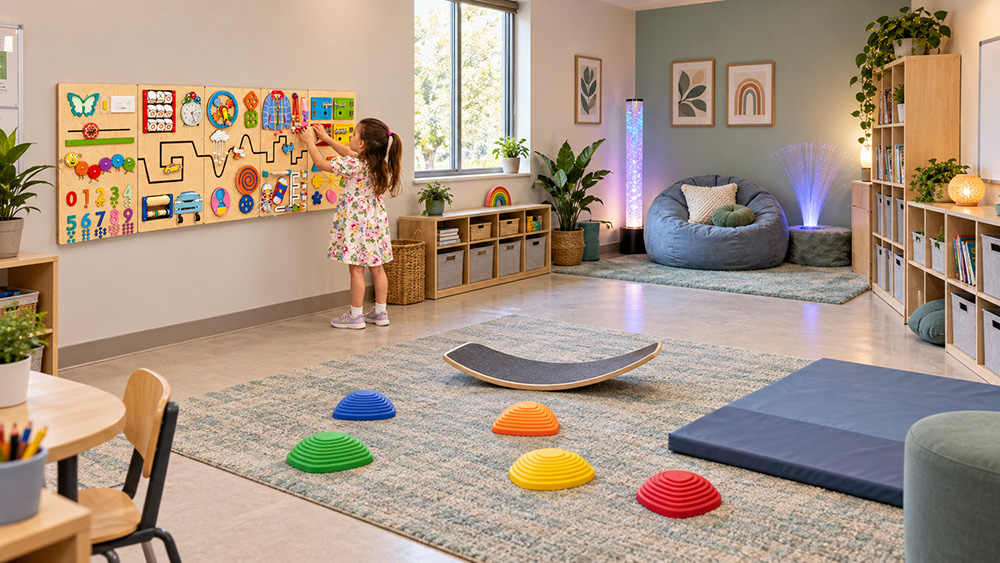
Low lighting, soft seating (bean bags, floor cushions, a canopy or pop-up tent), and low-arousal visual equipment like a portable bubble tube or projector. This may be the largest zone in a room built primarily for de-escalation.
Tactile zone
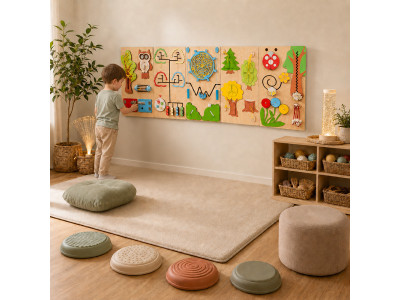
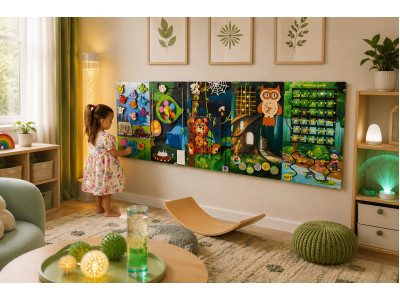
Wall-mounted or table-height equipment with textures, latches, and manipulatives, wall panels, textured mats, fidget stations. This is where a piece like a sensory wall panel typically lives, since it's wall-mounted and doesn't take floor space away from a movement zone.
Movement / active zone
Crash pads, a small trampoline or wobble cushion, a swing if the room and ceiling structure support one. This zone needs the most floor clearance and is usually the first one cut in a small room.
Visual / interactive zone
Light panels such as the PixelPop interactive light panel, mirrors, interactive projection, or fiber optic elements like a fiber optic jellyfish light. Often combined with the calming zone in smaller rooms rather than kept separate.
A small room doesn't need all four zones at full scale. In a small room, focusing on two well-defined zones (commonly calming plus tactile) may be more practical than fitting a token piece of equipment from all four into a room too small for any of them to function properly.
Essential sensory room equipment for schools
Equipment choice follows directly from the zones above. A possible equipment mix for a mid-size school sensory room might include:
- Soft seating and a defined calm-down corner
- Adjustable or dimmable lighting
- One or two wall-mounted tactile stations (sensory wall panels or a comparable fixed activity panel)
- A crash pad or floor mat if space allows
- One visual/interactive element (bubble tube, projector, or light panel)
- Noise-reducing elements: rugs, acoustic panels, or a white-noise machine if the room echoes
- Storage for smaller items (weighted blankets, fidgets, headphones) that stays organized between classes
Wall-mounted equipment is one practical option for schools specifically. Because it stays fixed in place through shared, daily use, it can reduce the number of loose items that need to be stored, reset, or replaced as students move through the room during the day. It isn't the only workable approach, and the right mix depends on the room's size, the zones you've planned, and how the space will actually be used.
Wall-mounted vs. floor equipment
This is one of the more consequential trade-offs in a school sensory room, and it's worth deciding deliberately rather than by default.
Many schools land on a mix: wall-mounted equipment for the tactile and fine-motor zone, floor equipment reserved for the movement zone, where it's often better suited to larger-body movement and proprioceptive activities.
Accessibility and shared-use design
A school sensory room is shared infrastructure, not a single student's space, which changes some design choices compared to a home sensory room.
- Reachable height: wall-mounted equipment should account for the shortest and tallest expected users, or include a mix of heights across the wall.
- Wheelchair and mobility-device clearance: leave enough clear floor space for wheelchair and mobility-device users to enter, turn, and approach usable equipment, and keep equipment usable from a seated position where possible.
- Sightlines for supervision: a window in the door or a low-profile layout lets staff check on a student without hovering inside the room.
- No single-user bottlenecks: a room meant for several students across a school day works better when at least one zone (typically the tactile wall) supports parallel use rather than one item that only one student can use at a time.
- Clear, simple signage or a visual schedule if the room is used on a rotating basis by different classes, so expectations are consistent regardless of which staff member is supervising.
Safety, durability, and maintenance
Equipment in a school sensory room gets more daily use than almost anything else in the building. A few practical, risk-reduction habits are worth building in from the start, alongside your school's own safety and facilities policies:
- Wipeable, easy-to-clean surfaces wherever possible, since the room needs to be cleaned between groups on a normal school cleaning schedule.
- Secure mounting for anything wall-fixed, checked periodically so nothing works loose under repeated use.
- Care with small or easily detachable components, particularly in rooms also used by younger students, choosing equipment and layouts that limit this where practical.
- Clear floor space around movement equipment and walkways, so the room stays easy to navigate and supervise.
- A simple maintenance routine, a periodic check for loose hardware or worn parts, kept as a short checklist so it doesn't fall to whichever staff member happens to notice.
- Vendor support for repairs. Ask any vendor what their process is for replacement parts if something breaks under normal use, before you buy, rather than after.
Budget planning
School sensory room budgets vary enormously depending on room size, how much of the space needs renovation (flooring, lighting, paint) versus just furnishing, and how much equipment the room needs on day one versus over a few budget cycles. A few things to plan around:
- Separate "room readiness" costs (flooring, lighting, paint, a door if one needs to be added) from "equipment" costs. The first category is often the larger one and is easy to underestimate.
- Equipment doesn't need to arrive all at once. A phased plan, calming zone and one tactile station in phase one, movement zone added in phase two, is a normal and often more sustainable approach than furnishing the whole room in a single purchase order.
- Get quotes itemized by equipment category (seating, lighting, wall equipment, floor equipment) rather than as one bundled number, so a partial budget can still fund a coherent room instead of a little of everything.
- The alternative to phasing is a complete package. If the room is clearly meant for calming and the space is ready, the Calming Sensory Room Package brings a bubble tube, fiber optic carpet, seating, projector, mirror ball and sound system in one order. It needs seven electrical outlets, so confirm the power supply before it goes into the quote.
What to prioritize with a limited budget
If the budget only covers one phase, start with whichever zone matches the room's primary purpose. For a room built mainly for calming, soft seating and controllable lighting for a calm-down corner will likely deliver most of the room's core function on its own, even with nothing else in place yet. For a room built mainly for active engagement, a movement-zone item or an interactive visual element may matter more at this stage than a calming corner. Beyond that first purchase, what to add next depends on whichever function is still missing, tactile, movement, or visual, rather than a fixed order. Wall-mounted equipment is one space-saving option worth considering when floor area is limited, not the default next purchase for every room. Our sensory room equipment category groups wall-mounted, portable and tactile options in one place.
Grants and funding considerations
Sensory room funding for schools commonly comes through a mix of sources rather than a single grant. Depending on the district, that can include general district or facilities budgets, school foundation funds, parent organization fundraising, and local or community grant programs. Some districts also have special-education program budgets that can apply, depending on how the room is used and district policy.
Eligibility and available programs vary significantly by state and district, and change over time, so the most reliable next step is checking with your district's special education office, business office, or grants coordinator about what's currently available, rather than assuming any specific program applies.
Example school sensory room layout
For a mid-size room serving a self-contained classroom group:
- One wall: a wall-mounted tactile station (sensory wall panel or equivalent) sized for parallel use by two to three students
- Opposite corner: calming zone with a canopy or tent, floor cushions, and a dimmable lamp
- Remaining floor space: a crash pad or small trampoline, positioned so it doesn't block the door or the tactile wall
- One additional wall or corner: a wall-mounted LED bubble wall, bubble tube or light projector as the visual/interactive element
- Storage: a closed cabinet or bin along the shortest wall for rotating smaller items
Implementation checklist
- Define who the room is for and its primary purpose
- Select and measure the room
- Confirm lighting control and any needed electrical work
- Sketch a zoned layout on paper before ordering equipment
- Separate room-readiness costs from equipment costs in the budget
- Order phase-one equipment (seating, lighting, one tactile station)
- Confirm accessibility: reach height, clearance, sightlines
- Set a weekly maintenance check and a point of contact for repairs
- Create simple usage guidelines or a visual schedule for staff
- Review after one semester and adjust before the next equipment phase
Common planning mistakes
- Buying equipment before defining purpose or user group. This can become an expensive mistake, since it often means replacing or supplementing equipment later.
- Filling every wall and floor space at once. A crowded room with no clear zones is harder to use and harder to supervise than a smaller room with two zones done well.
- Choosing equipment that only one student can use at a time in a room meant for building-wide or classroom-wide use, creating a bottleneck during busy periods.
- Skipping the maintenance plan. Equipment that isn't checked regularly wears out faster under daily shared use than the same equipment in a single-family home.
- Treating the room as finished after the first purchase. A phased, reviewed approach can produce a more usable room than a one-time furnishing budget spent all at once.
For preschool and infant/toddler classrooms specifically, equipment sizing and durability requirements differ enough to be worth a separate look; see sensory wall panels for daycare. And if the room is being built with autistic students as a primary user group, pair this planning guide with how sensory walls can support inclusive classrooms for the additional considerations that group tends to need.
Frequently asked questions
How much space do I need for a school sensory room?
There's no fixed minimum. A smaller room can work well for one or two zones, typically a calming corner plus a wall-mounted tactile station. A larger room makes it easier to fit a full four-zone layout with room for small-group use. The room and the purpose should be matched before equipment is chosen, not the other way around.
What's a realistic budget for a school sensory room?
Budgets vary widely based on whether the room needs renovation work and how much equipment is added at once. A phased approach, funding a calming zone and one wall-mounted station first, then adding a movement zone in a later budget cycle, is common and often more sustainable than furnishing everything in a single purchase.
Do school sensory rooms need to be soundproofed?
Full structural soundproofing is often unnecessary for a basic school sensory room; many schools instead focus on reducing echo and outside noise where practical, for example with a rug, acoustic panels, or a white-noise machine.
Can a sensory room double as a calm-down or de-escalation space?
Yes, this is one of the most common uses in schools. A room built with a calming zone (low lighting, soft seating, minimal choice) generally works for de-escalation, and the same room can support an engagement-focused sensory break at a different time of day if it also includes a tactile or movement zone.
Are there grants available for school sensory rooms?
Funding often comes from a mix of sources, including special education program budgets, parent organization fundraising, and local community or disability-services grants. Availability varies by state and district, so the special education office or grants coordinator at your district is the most reliable place to check current options.
What should I buy first if the budget is limited?
This depends on the room's primary purpose. For a calming-focused room, soft seating and controllable lighting for a calm-down corner will likely deliver most of the room's function on its own. For a room built more for active engagement, a movement or visual element may matter more first. After that, the next purchase usually depends on whichever function, tactile, movement, or visual, is still missing, rather than a fixed order.




Write a comment